
Today was the perfect Autumn day, and one I thoroughly enjoyed being that I had the opportunity to do what I love most: cook and shoot. It’s been quite a while since I’ve had the time to do a recipe shoot, so I can honestly say my heart is in it’s happy place again!
It’s also a rather special shoot to share, being that it’s my first as a non full time corporate day job employee! This week marks my first week being nearly full time freelance (I still have a couple days at the office but that’s it), and it’s a dream come true! I’ve waited a long time to be able to pursue photography and styling, and it really is still quite surreal that I get the privilege of making this transition. I’m really excited for what’s to come and want to thank you all for your support and love in this last year of my blog! It’s been an incredible journey and I wouldn’t have gotten this far without your support and kindness along the way.
—
This recipe features the incredible Big Spoon Roasters, my absolute favorite nut butter company!
Big Spoon Roasters makes handcrafted nut butters from scratch in Durham, North Carolina. Our carefully selected nuts and wildflower honeys are sourced from local and like-minded farmers who share our dedication to authentic quality. Each small batch is roasted, milled, and packaged while still warm to produce nut butters that are uniquely fresh, delicious, and nutritious.
Every nut butter is delicious and unlike any other nut butters I’ve tried. If you don’t want to just take my word for it, do yourself a favor and order the Chai Spice butter and see for yourself. It’s literally like candy- I can’t ever stop eating it! And just think – – jars of these nut butters would make excellent gifts for family and friends! The holidays are quickly approaching, so keep it in mind as an option for the tastiest gift.


In case you haven’t heard about my upcoming event, I have just a handful of tickets available for my next dinner, hosted just outside the Portland area at a beautiful lodge on an old Christmas tree farm. My amazing friend and stylist Stacey Clark will be joining Eva and I in teaching a full day food photography & styling workshop! We’ll top off the day with part 2 of the event, a long table gathering. It’ll be wonderfully wintery and magical at the lodge and this is an event you won’t want to miss! Just think, you could treat yourself to an early Christmas present and join us!
You can find further info available at the ticket link below:
Food Styling & Photography Workshop + Long Table Winter Gathering
Space is extremely limited to maintain the nature of our intimate events, so make sure to book as soon as possible to secure your place with us!


I made this recipe a couple of years back for a dinner party I hosted at my house, and I’ve loved making it ever since as it requires little effort and has such beautiful presentation. The Cider Mousse is delightful on its own too, simply topped with shaved apple slices. It is optional for this recipe, but I’d highly recommend making it regardless as you can serve it any way you like.
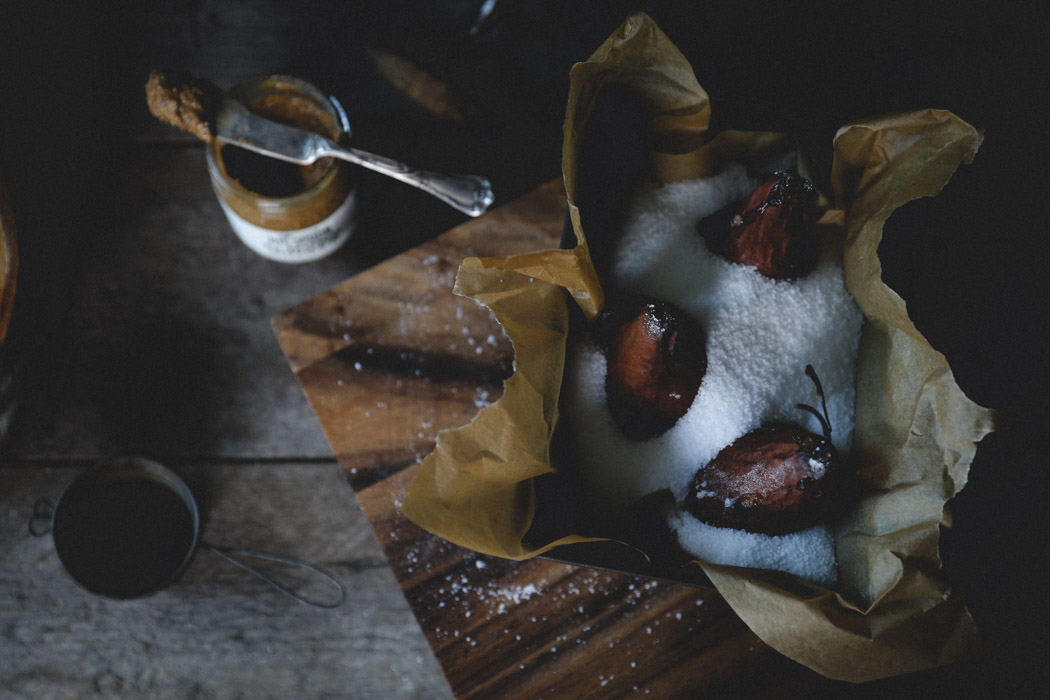
If you’ve never salt roasted anything, you definitely need to try it! The salt regulates the temperature and whatever is being roasted will be more gently cooked and any moisture that is released will allow the salt to generate steam. More info here if you care to look into it further!
The combination of salty and sweet in this dessert is just divine. Serve with a cup of hot apple cider on a crisp Autumn evening and you’ll be in your happy place in no time. Enjoy!
[recipe-box]
Salt Roasted Pears with Almond Ginger Nut butter and Cider Mousse
Serves 4
4 Bosc pears, unripened, rinsed and patted dry
1 1/2 pounds coarse salt
1/3 c. Big Spoon Roasters Almond Ginger nut butter
½ gallon organic fresh apple cider
1 c. organic heavy whipped cream
½ c. Mascarpone cheese
2 t. pure maple syrup
3 t. reduced cider
pinch of Fleur de Sel French Sea Salt
Preheat oven to 350 degrees. Prep pairs by coring out the inside from the bottom of the pear. Reserve the core. Using a small spoon, stuff the inside of pears with nut butter. You can core out a small hole or wider hole, depending on the amount of nut butter you’d like. Cut the reserved core down to a ¼” end piece, and use this to cover the bottom so the nut butter doesn’t seep out when cooking.
Arrange the pears upright in a dish that is 4 inches deep. Cover pears with kosher salt allowing stems to stick out. Bake until pears are tender when pricked with a fork, 60 to 75 minutes.
While pears are baking, pour apple cider into a large, non-reactive stockpot (stainless steel, copper, or glass, but NOT aluminum unless it’s coated.) Turn heat to high, cover the pot with a splatter screen if you have one, and bring to a boil. You may need to reduce the heat to medium, but keeping it at a steady rolling boil.
Boil the cider hard until it has reduced to 1/7th of its original volume. Watch more carefully toward the end, and remove from heat when it reduces down. Cool at room temperature and allow to thicken. Pour into a clean, sterile jar (for long term storage) or a clean, empty wine bottle (for short term, refrigerated storage). Cover tightly and store in a cool, dark place. Check out this link for other ways to use the remaining reduced apple cider, as you’ll have extra.
Prepare the cider mousse by whipping the cream in a mixer. Make sure to slow down before it turns into the consistency of whip cream. At this point, add reduced cider and maple syrup. Begin beating on low to incorporate. Add mascarpone in small additions, keeping an eye on the consistency of the whip cream, as to not over mix. Sprinkle in a pinch of sea salt and stir with a spatula. Cool in fridge for 15 minutes before serving.
Serve warm pears on top of a couple spoons of the cider mousse and drizzle with caramel sauce. Enjoy!
[/recipe-box]


